
Guest Post: Austin Newton on starting a blog
Austin Newton is Communications Specialist at The Rio Texas Annual Conference. He is the conference Web Master, I.T. Help Desk Coordinator, Graphic Designer, Social Media Specialist, and all around “Get Things Done Guy.” I asked him to write this post after he shared an email he had sent to someone who wanted to start a blog. He explains things in a way non-techies can understand. This is the most thorough explanation I have seen on how to start a blog on Weebly. If you are interested in getting started with a blog, check it out
Last week, I was pleased with the opportunity to assist a pastor with starting a blog. She had a member of her congregation that wanted to start blogging. This pastor had no idea how to start a blog. I referred her to Weebly. I found a nifty YouTube video from an English teacher, but I noticed it was just a little outdated. I decided to give Pastor Bob a Weebly blog, because if Pastor Bob is fake and he can start a Weebly blog, you can too.
This is Weebly’s homepage. If you already have a Weebly account, go ahead and click Log In. However, if you are reading this post, you probably need to make blog, therefore make a Weebly account.
 Click on Blog so that your website is tailor-made to start a blog.

Now Weebly is going to prompt you to choose a theme. You can scroll down and look through all the different styles you can choose. You can also choose color headings in those little color squares.
 Click “Choose” after you are done perusing and choosing your colors.
Next, Weebly wants you to choose your website name. If you choose a free account, you are going to have to type in what your website to be, with .weebly.com as the end of your domain. If you want yourname.com, you’re going to have to pay for that website name. If you don’t want to pay a dime, don’t worry about it and just use the subdomain. Click continue once the checkmark comes up and you’re comfortable with your website name.

Wow, nowadays you can “plan your website.” This is made if you want to carefully detail your blog or website. I think it can be a great tool, but it ismostly check marks and checklists of what you should get started on. There are some helpful videos and links to teach you how to create bulleted lists and creating site goals. If you have the time, go ahead and browse through this “Plan Your Website.” If you want the quick and dirty way to start a blog, go ahead and skip this part and click “Build My Site.”
 Next, you’re going to be prompted to edit your home page settings. Type in a“Page Name” and a Page Layout. The Header options will give you an idea of if you want a large design, logo, or photo at the top of your blog. Click “Save and Edit.” When you’re done and comfortable.
Now you’re under the hood and ready to start making some serious ground with your Weebly blog. Try clicking on the heading [“CLICK TO ADD HEADLINE”] to change the title of your page.
See the author portion on the right? It’s asking you to “write something about yourself. “ Just hover your mouse over to that section, click on it, and you can start editing that little section. It’s really that simple.
Now everyone knows who Pastor Bob is. Now it’s time to write his first blog post, which is something you should be doing on a regular basis for your new readers. Click on “New Post” at the bottom
right-hand corner.
Every blog post should have a title. Hover your mouse cursor over to the heading and start a title. Mine will say “Bob is Back.”
Now here’s the fun part. We’re going to start dragging and dropping elements to your blog post. This is where we can drag video, pictures, and text. For now, let’s start with adding some text to our blog post.
Find the “text” icon box on the left side of the blog editor. Not drag and drop it to your blog post like so.
You can edit your text using the black style editor dialog box that appears.Try changing the color by highlighting your text first, and then choosing the color from the palette.
You can also chooseto boldface, italicize, underline, and so forth using that same black style editor dialog box that appears.. If you’re never happy with your formatting, you can always get rid of it by hitting the button that looks like Tx.
Pastor Will and I really suggest that you write all of your posts in a Word document to proofread your grammar and spelling. Then copy and paste it into the text box on Weebly.
Are you ready to add an image to your blog post? Let’s go back to the blog editor and drag and drop the “IMAGE” block. Pay attention to where the line appears. That shows you how big the image width or height will be and where it’s going to be positioned in your post. Once you set the position, drop it there and click on the “Add Image” gray box. Look for your image and upload it!
You can ad d images, galleries, videos, maps, whatever your heart desires. I really encourage you to play around with your blog post by looking at that “Blog Editor.”
After you are done typing, editing, underlining, bolding, choosing colors, wherever God’s will is for your blog, go ahead click on “POST” at the very top right-hand corner.
Uh-oh. Anotherdialogue box appears! But don’t fret! It’s asking you to “Publish” your site. What that means is that it wants your permission to make your blog website a live, searchable, it-will-appear-on-Google, anyone-can-find-it blog website.
Look at the top right hand corner again. It changed from “POST” to “PUBLISH.” Go ahead and click that publish icon and follow the dialogue boxes.
It’s going to ask you about your domain name again. Go ahead and skip this part if you know you want a free account. Hit “Continue.”
Now it wants you to categorize your website. I suggest you use “Personal” or “Organization.”
It’s going to ask you to look at a photo and type in whateveryou see. This is called a captcha and it is there so that Weebly makes sure you are a real person and not a robot or an automatic SPAM generator. Enter the words and click “OK, Publish my site!”
BAM. You have published your blog. Write down your website URL so that you can copy and paste it onto your Church website, twitter, Facebook. Publicize your blog as much as you can so you can gain readers! Trust us! You want readers!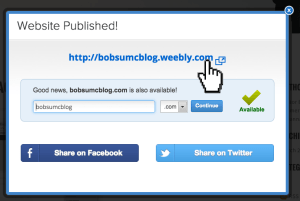
Did this tutorial help you, or do you need a little more help? Weebly can help you out some more. Look in your inbox and look for an e-mail sent to you titled, “Welcome to Weebly!” There is a link to attend a Weebly webinar.
If you ever need to turn off your computer, fire up Chrome, Firefox, Explorer or Safari, and need to edit your blog. That’s fine. Just go back to Weebly.com. Click Sign-in on the top right-hand corner. Enter your e-mail and password credentials. Then the screen will change to a “My Sites” page. Click the blue “Edit” button.
That wasn’t so hard, was it? Let us know in the comments below!


